Showing posts with label recipes. Show all posts

Friday, August 19, 2011

Bacon goes with...Chocolate Chip Cookies?

I enjoy trying new, unusual recipes, and last week my sister sent me a link to a recipe I just couldn't resist trying--Brown Butter, Bacon, and Chocolate Chip Cookies. ( http://mouthfromthesouth.com/brown-butter-bacon-chocolate-chip-cookies/ ). The recipe called for three kinds of chocolate, giving me an excuse to buy three bags of chocolate chips, and I'd never made brown butter before, either, so I was really looking forward to trying it.

Making the brown butter wasn't hard, just a little time-consuming since I was worried about burning the butter (the recipe and my sister both warned that the butter could go from "a little brown" to "burned beyond being able to use" in just a few seconds). The instant it started to turn brown and smell nutty, I took it off the heat.

The batter tasted just like batter for chocolate chip cookies...with bacon. (I felt an obligation to try the batter, just to make sure it tasted ok to bake. I wouldn't want to serve my family an inferior product, after all!). As I spooned out the batter on the cookie sheets, it was a little strange to see bacon pieces among the chocolate chips...but they came out of the oven smelling wonderful!

Morgan wouldn't taste a cookie until I did...I bravely bit in...waited for the taste to hit me...and the cookie tasted like...a chocolate chip cookie with bits of bacon in it. It wasn't horrible or disgusting, but wasn't anything fantastic either. I tried another cookie this morning (OK, two of them) just to see if "aging" overnight made a difference...nope. I'm going to send some of the cookies to my niece; maybe she'll take them to school on Monday. I don't know if they'll make her "the-most-popular-girl-to-trade-lunches-with," or "the- girl-to-avoid-trading-lunches-with"...but I bet she'll try them.

My suggestion? Try the recipe but leave out the bacon. Tim was right--chocolate chips and bacon are both essential food groups...best served separately.

And I will look forward to the next unusual recipe Becky sends me!


There is a whole cup of chopped
up bacon in this bowl!


Thursday, July 21, 2011

It's Time for BLT's!

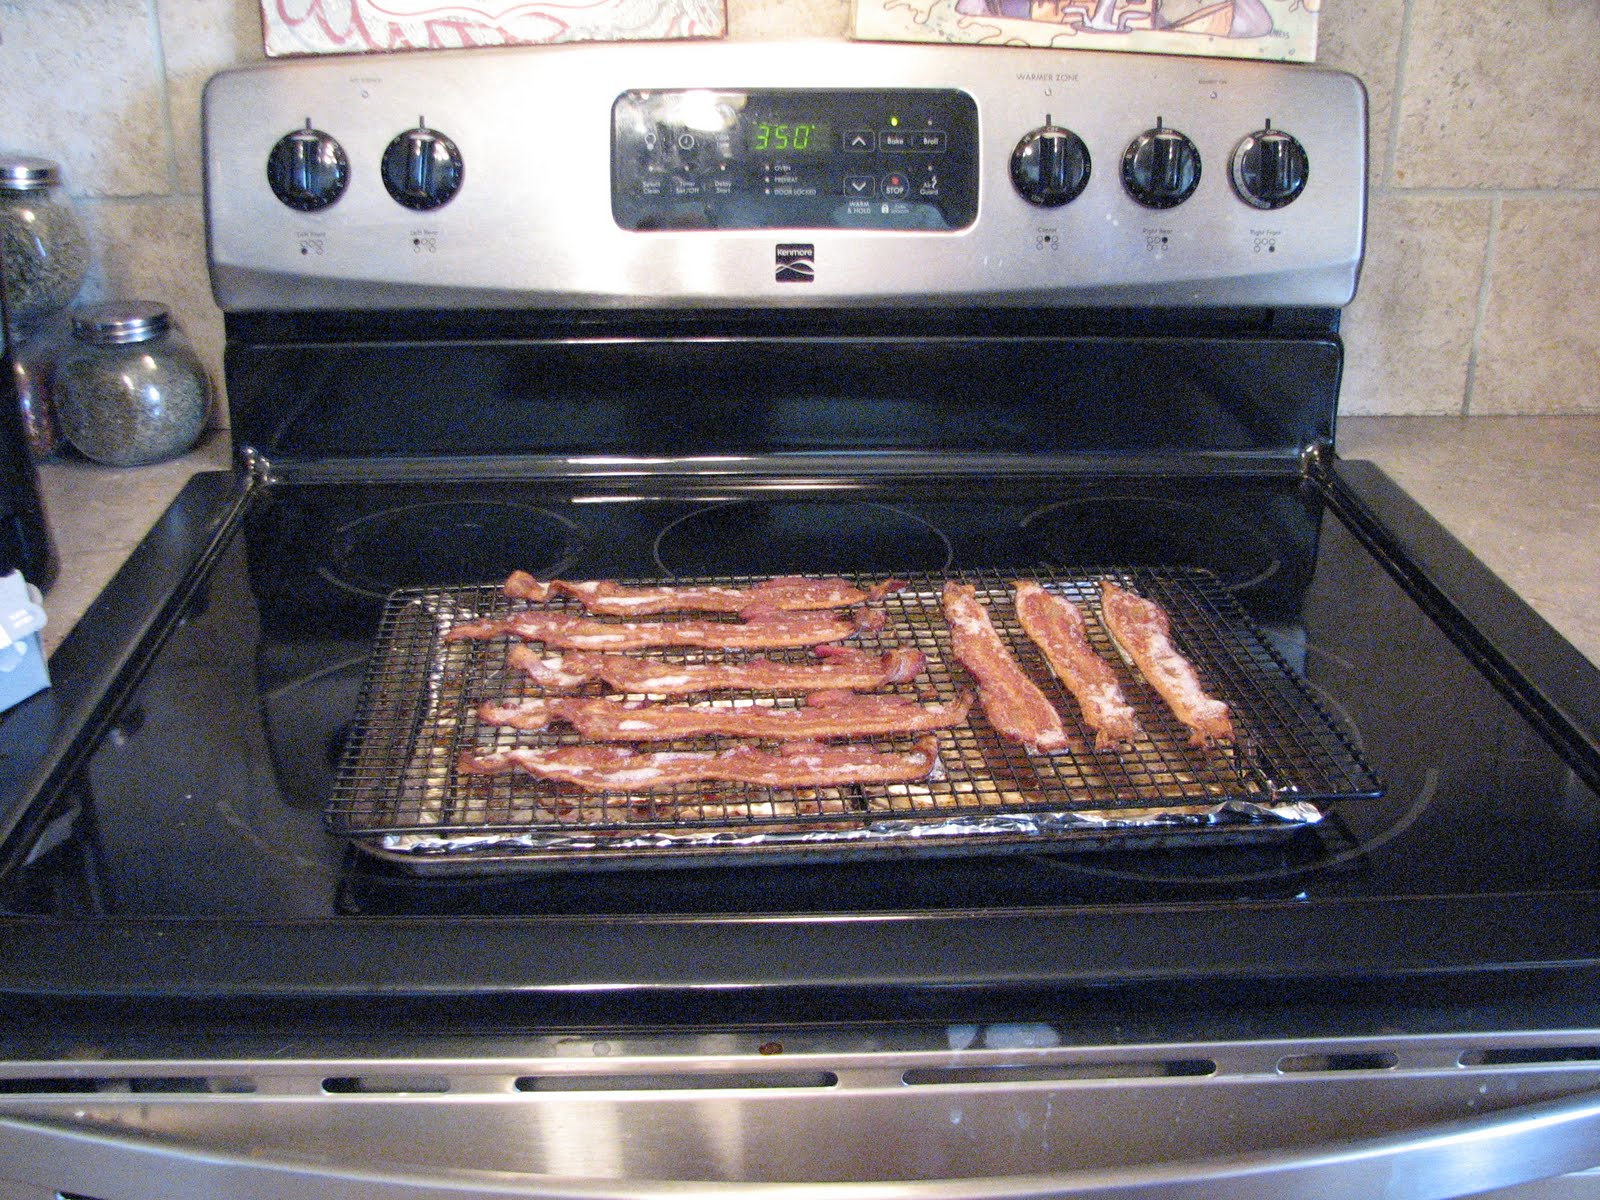
It is my favorite (well, almost favorite) time of year--tomato season! And in our house, that means BLT's become a very frequent meal. The most time-consuming part of making BLT's is the "B"--browning the bacon. My sister gave me a great hint for making this messy, hot, time consuming job a lot easier. She BAKES her bacon!

You'll need a cookie cooling rack, some tin foil, and a rimmed cookie sheet. Line the cookie sheet with tin foil and place the cooling rack on top. Then simply lay the bacon on the cooling rack (make sure all of the bacon is over the cookie pan so grease goes into the pan and doesn't drip on the bottom of the oven). Bake at 350 degrees for about 20 minutes, or until desired crispness.

Be careful when you get the sheet out of the oven as the bacon grease will be in the cookie pan.

Unfortunately this technique doesn't take away the calories from the bacon...but it does take away grease splattered all over your stove top and you don't have to tend to it constantly.

Here's another hint--at the beginning of the summer I baked several packages of bacon, then crumbled them and froze them in small baggies. When I make salads that call for bacon, I simply take it out of the freezer. It's a fantastic time saver!

Cody thought it was really silly of me to to take pictures of bacon but I'm going to post them here anyway. He just rolled his eyes at me. But he'll be happy when he has plenty of bacon for BLT's tonight!

Friday, July 8, 2011

Make Ice Cream in a Bag

How to Make Home-Made Ice Cream in a Bag (from eHow.com)
(Editor's Note: I've tried this and it really works--and is fun, too!)


Are the kids getting bored on a hot summer day? Letting the kids make their own home-made ice cream is a great summer treat! It only takes a few minutes and it only sounds messy. (And they will even learn something when you explain to them how the ice cream forms.)

Follow these simple instructions and you and your children will be eating home-made ice cream in just a few minutes!

Things You'll Need

• 1 tablespoon sugar
• ½ cup of milk or half & half (or cream for richer ice cream)
• ¼ teaspoon vanilla
• 6 tablespoons rock salt
• 1 pint-sized re-sealable plastic bag
• 1 gallon-size re-sealable plastic bag
• Ice

1. The ingredients listed here are enough to make one bag of ice cream. Mix the milk or half & half, sugar, and vanilla into the smaller bag and seal it. Half & Half makes richer ice cream, but milk works just fine too. Make sure the bag is sealed tight! (Consider sealing it in another bag to make sure none leaks out!)

2. Put enough ice in the larger bag to fill it about halfway. Add the rock salt and seal the bag. Mix the salt and ice a little by squeezing the bag. Open the bag and insert the smaller bag with the ice cream contents into the larger bag. Seal the larger bag.

3. Shake, squish and move the bag around until the smaller bag's contents changes into ice cream. This only takes a few minutes. The outer bag will condensate water (like a glass of cold water on a hot day), so this is best done outdoors.

4. When the smaller bag contains ice cream, open the larger bag and remove the smaller bag. Wipe the water off of the smaller bag. Open the smaller bag carefully and enjoy your home-made summer treat!

How does it work?

When salt comes into contact with ice, the freezing point of the ice is lowered, meaning that instead of freezing at 32 degrees, it must be at a lower temperature before it freezes (that’s why we use salt on the roads to melt ice in the winter time). When you combine ice and salt in the bag, some of the ice melts because the freezing point of the ice is lowered. The ice must absorb heat to melt, and it takes that heat from the half-and-half mixture in the other bag. When heat is taken from the half-and-half mixture, the temperature goes down and it eventually turns to ice cream.

Monday, April 18, 2011

Easter Cookie Story

Bake these cookies to teach your children (or your grandchildren, or children’s friends) about Easter. Read through the directions so you can smoothly move from one step to the next and talk about the Bible readings. Plan plenty of time for discussion and questions. Step 2, breaking up the nuts, can be done early in the day or the day before, to save time while putting the rest of the recipe together.

Ingredients

1c. whole pecans
1 tsp. vinegar
3 egg whites
a pinch salt
1c. sugar

zipper baggie
wooden spoon
tape
Bible

Directions

1. Preheat oven to 300

2. Place pecans in zipper baggie and let children beat them with the wooden spoon to break into small pieces. Read John 19:1-3 Explain that after Jesus was arrested, the Roman soldiers beat him.

3. Let each child smell the vinegar. Put 1 tsp. vinegar into mixing bowl. Read John 19:28-30Explain that when Jesus was thirsty on the cross he was given vinegar to drink.

4. Add egg whites to vinegar. Eggs represent life. Read John 10:10-11 Explain that Jesus gave His life to give us life.

5. Sprinkle a little salt into each child's hand. Let them taste it and brush the rest into the bowl. Read Luke 23:27 Explain that this represents the salty tears shed by Jesus' followers, and the bitterness of our own sin.

6. So far the ingredients are not very appetizing. Add 1c. sugar. Read Ps. 34:8 and John 3:16. Explain that the sweetest part of the story is that Jesus died because He loves us. He wants us to know and belong to Him.

7. Beat with a mixer on high speed for 12 to 15 minutes until stiff peaks are formed. Read Isaiah 1:18 and John 3:1-3 Explain that the color white represents the purity in God's eyes of those whose sins have been cleansed by Jesus.

8. Fold in broken nuts. Drop by teaspoons onto wax paper covered cookie sheet. Read Matt. 27:57-60 Explain that each mound represents the rocky tomb where Jesus' body was laid.

9. Put the cookie sheet in the oven, close the door and turn the oven OFF. Give each child a piece of tape and seal the oven door. Read Matt. 27:65-66. Explain that Jesus' tomb was sealed.

10. GO TO BED! Read John 16:20, 22. Explain that they may feel sad to leave the cookies in the oven overnight. Jesus' followers were in despair when the tomb was sealed.

11. On Easter morning, open the oven and give everyone a cookie. Notice the cracked surface and take a bite. The cookies are hollow! On the first Easter Jesus' followers were amazed to find the tomb open and empty.

This object lesson walks the participants through the Easter story and focuses on the hope and promise of resurrection.

This recipe appeared in the April issue of the Nebraska Family Times. If you would like a free sample copy of the Nebraska Family Times, e-mail shelly@shellyburke.net or call (402) 993-2467.

Saturday, April 17, 2010

Chocolate Covered Bacon


I've seen numerous recipes for and raves of chocolate-covered bacon. I like to try unusual recipes, so thought I'd finally try it.


Guess what chocolate covered bacon tastes like?


Bacon dipped in chocolate!


It's not as repulsive as some of the members of the family feared it might be...but it's nothing special either. Good thing I only made a few pieces to try! Obvioulsy, others love it...but I'll continue searching for a fun, unusual recipe to make for Cody's graduation party.